


OBD2 Scanner Manual⁚ A Comprehensive Guide
This comprehensive guide will walk you through the world of OBD2 scanners, explaining what they are, their benefits, types, how to use them, and more. We’ll cover everything from connecting the scanner to your vehicle to interpreting and clearing trouble codes, ensuring you have the knowledge and tools to diagnose and maintain your car effectively.
Introduction
In the modern automotive landscape, understanding your vehicle’s health is paramount. Gone are the days of relying solely on the check engine light to signal potential issues. The advent of OBD2 technology has empowered car owners to take a proactive approach to vehicle maintenance, and the key to unlocking this capability lies in the OBD2 scanner.
This manual serves as your guide to the world of OBD2 scanners, providing a comprehensive overview of their capabilities, usage, and benefits. Whether you’re a seasoned mechanic or a novice car enthusiast, this guide will equip you with the knowledge to navigate the intricacies of OBD2 diagnostics.
Through clear explanations and step-by-step instructions, we’ll explore the various types of OBD2 scanners available, the essential steps involved in connecting and using them, and the crucial information they can reveal about your vehicle’s performance. By understanding the language of OBD2 codes and the insights they provide, you can gain valuable control over your car’s maintenance, ensuring it runs smoothly and efficiently.
So, let’s embark on this journey of automotive empowerment and unlock the secrets hidden within your vehicle’s diagnostic system.
What is an OBD2 Scanner?
An OBD2 scanner, also known as an OBDII scanner or code reader, is a diagnostic tool used to communicate with your vehicle’s onboard computer system, known as the Powertrain Control Module (PCM). This system constantly monitors various aspects of your car’s engine and emissions control systems, recording data and detecting potential issues.
The OBD2 scanner acts as a translator, allowing you to access this information stored within the PCM. It reads and interprets diagnostic trouble codes (DTCs), which are essentially error messages generated by the vehicle’s computer system when a problem is detected. These codes provide valuable insights into the specific components or systems experiencing issues.
Beyond reading trouble codes, OBD2 scanners can also display live data streams, allowing you to monitor various engine parameters in real-time, such as engine speed, fuel pressure, and oxygen sensor readings. This information can be invaluable for troubleshooting performance issues, detecting potential problems before they escalate, and even optimizing your vehicle’s performance.
Benefits of Using an OBD2 Scanner
Investing in an OBD2 scanner offers a multitude of benefits for car owners, both in terms of cost savings and peace of mind. Here are some key advantages⁚
- Early Problem Detection⁚ OBD2 scanners can alert you to potential issues before they become major problems, saving you from costly repairs down the line.
- DIY Diagnosis⁚ By reading and interpreting trouble codes, you can often identify the root cause of engine problems yourself, eliminating the need for expensive trips to the mechanic.
- Cost Savings⁚ Being able to diagnose issues independently can save you significant money on labor costs when it comes to repairs.
- Increased Vehicle Performance⁚ Monitoring live data streams allows you to optimize your vehicle’s performance by adjusting settings or identifying areas for improvement.
- Peace of Mind⁚ Having an OBD2 scanner gives you greater control and understanding of your vehicle’s health, providing reassurance and reducing anxieties related to potential car troubles.
The ability to diagnose and monitor your vehicle independently empowers you to make informed decisions about maintenance and repair, ultimately leading to a more reliable and efficient driving experience.
Types of OBD2 Scanners
OBD2 scanners come in a variety of shapes and sizes, each catering to different needs and budgets. Here’s a breakdown of the most common types⁚
- Basic Code Readers⁚ These affordable scanners primarily read and clear trouble codes. They are ideal for basic diagnostics and troubleshooting, but lack advanced features like live data monitoring.
- Advanced Scanners⁚ These scanners offer a wider range of features, including live data monitoring, graphing, and sensor readings. They provide a more in-depth understanding of your vehicle’s performance.
- Smartphone Apps⁚ Many apps are available that connect to your phone via Bluetooth or Wi-Fi and use your phone’s display to display diagnostic information. These apps are often budget-friendly and offer a convenient way to access basic diagnostics.
- Professional-Grade Scanners⁚ Designed for mechanics and technicians, these scanners offer comprehensive diagnostics, advanced programming capabilities, and extensive data analysis. They are typically more expensive but provide the most comprehensive tools.
When choosing an OBD2 scanner, consider your budget, the level of detail you require, and your intended use. If you’re looking for basic troubleshooting, a code reader will suffice, while advanced users might benefit from a professional-grade scanner.
How to Use an OBD2 Scanner
Using an OBD2 scanner is generally straightforward, but specific instructions may vary depending on the scanner model. Here’s a general guide⁚
- Locate the OBD2 Port⁚ The OBD2 port, also known as the Data Link Connector (DLC), is typically located under the dashboard on the driver’s side. It’s a 16-pin rectangular connector.
- Connect the Scanner⁚ Plug the OBD2 scanner’s connector into the DLC. Ensure a secure connection.
- Turn on the Ignition⁚ Turn the ignition key to the “ON” position, but do not start the engine. This allows the scanner to communicate with the vehicle’s computer.
- Follow Scanner Instructions⁚ Each scanner has its own interface and instructions. Follow the on-screen prompts or consult the user manual for specific steps.
- Read and Interpret Codes⁚ The scanner will display any trouble codes stored in the vehicle’s computer. Use the scanner’s built-in code library or online resources to decipher the meaning of the codes.
- Clear Trouble Codes⁚ Once you’ve addressed the issue causing the trouble codes, you can clear them from the computer’s memory using the scanner. This will reset the “Check Engine” light.
Remember to always consult your vehicle’s owner’s manual for specific information on using the OBD2 system and any additional instructions.
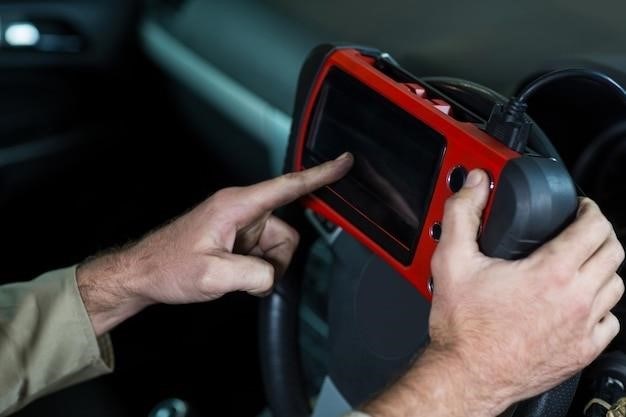
Connecting the Scanner
Connecting your OBD2 scanner to your vehicle is a simple process. Follow these steps⁚
- Locate the OBD2 Port⁚ The OBD2 port, also known as the Data Link Connector (DLC), is typically located under the dashboard on the driver’s side. It’s a 16-pin rectangular connector. You can usually find it near the steering column or under the center console;
- Plug in the Scanner⁚ Plug the OBD2 scanner’s connector into the DLC. Ensure a secure connection. It should fit snugly into the port.
- Check for Secure Connection⁚ After plugging in the scanner, make sure the connection is secure. You should hear a slight click when it’s properly connected.
- Turn on the Ignition⁚ Turn the ignition key to the “ON” position, but do not start the engine. This allows the scanner to communicate with the vehicle’s computer.
- Wait for Connection⁚ Give the scanner a few seconds to establish a connection with the vehicle’s computer. You might see a message on the scanner’s display indicating a successful connection.
If you’re having trouble connecting, check the DLC for any obstructions and ensure the scanner is compatible with your vehicle. Consult your scanner’s manual or online resources for troubleshooting tips.
Reading and Interpreting Codes
Once the scanner is connected and the ignition is on, you can start reading trouble codes. These codes are numerical values that indicate specific problems within your vehicle’s systems. Here’s how to read and interpret them⁚
- Select “Read Codes”⁚ On your scanner’s interface, choose the option for reading trouble codes. This might be labeled as “Read DTCs” (Diagnostic Trouble Codes) or “Read Codes.”
- View the Code List⁚ The scanner will display a list of codes. Each code will consist of a combination of letters and numbers, such as “P0300” or “B1234.”
- Use a Code Lookup Tool⁚ To understand the meaning of these codes, you can use an online code lookup tool or refer to your scanner’s manual. Many scanners have built-in code definitions.
- Decode the Code⁚ The first digit of a code indicates the system where the problem lies. For example, “P” stands for Powertrain, “C” for Chassis, “B” for Body, and “U” for Network. The remaining digits provide more specific information about the problem.
- Analyze the Information⁚ The code lookup tool will provide a detailed explanation of the code’s meaning, helping you understand the issue.
By understanding the codes and their meaning, you can pinpoint potential problems in your vehicle’s systems and take appropriate action.
Clearing Trouble Codes
Once you’ve identified and understood the trouble codes, you might want to clear them from your vehicle’s memory. Clearing codes can be useful for a few reasons⁚
- Resetting the System⁚ Clearing codes can help reset the vehicle’s computer system, allowing it to start fresh and detect new problems;
- Troubleshooting⁚ Clearing codes can help you isolate issues. After clearing codes, drive the vehicle for a while and then check again to see if any codes reappear. This can help determine if the problem is intermittent or persistent.
- Turning Off Check Engine Light⁚ If the check engine light is on due to a minor issue that has been resolved, clearing the code will turn off the light.
To clear trouble codes, follow these steps⁚
- Select “Clear Codes”⁚ On your scanner’s interface, locate the option to clear codes. This is usually labeled as “Clear DTCs” or “Clear Codes.”
- Confirm the Action⁚ Your scanner may prompt you to confirm that you want to clear the codes.
- Observe the Results⁚ After clearing the codes, the scanner may display a message indicating that the codes have been cleared.
Remember, clearing codes doesn’t fix the underlying problem. It simply erases the record of the code from the vehicle’s memory. If the problem persists, you’ll need to address it to prevent the code from reappearing.
Common OBD2 Codes and Their Meanings
OBD2 codes are standardized, using a specific format to indicate the system and type of problem. Understanding these codes is crucial for effective diagnosis. Here’s a breakdown of common OBD2 codes and their meanings⁚
- P-codes (Powertrain)⁚ These codes relate to the engine, transmission, and other components involved in vehicle propulsion. They often point to issues with fuel systems, ignition systems, emissions control systems, and more.
- B-codes (Body)⁚ These codes are associated with body control modules, encompassing various functions like lighting, door locks, windows, and climate control.
- C-codes (Chassis)⁚ These codes relate to chassis systems, including anti-lock brakes (ABS), traction control, and stability control.
- U-codes (Network)⁚ These codes indicate problems within the vehicle’s communication network, affecting data transfer between different control modules.
Each code is structured as follows⁚
- First character⁚ Indicates the code type (P, B, C, or U).
- Second character⁚ Identifies the system or subsystem affected.
- Third and fourth characters⁚ Specify the specific fault code.
- Fifth character (0-9)⁚ Provides additional information about the fault.
For instance, a code like “P0300” indicates a general misfire condition in the engine. You can find detailed explanations of specific codes in online resources, repair manuals, or by consulting with a mechanic.
Troubleshooting Tips
Once you’ve identified a trouble code, it’s time to troubleshoot the issue. Here are some general tips to guide you through the process⁚
- Consult Repair Manuals⁚ Your vehicle’s owner’s manual or a dedicated repair manual can provide specific instructions for diagnosing and resolving common problems related to the code.
- Verify Code Accuracy⁚ Ensure the code you’re reading is accurate by re-scanning and comparing results.
- Inspect Related Components⁚ Based on the code, visually inspect the related components, looking for signs of damage, wear, or loose connections.
- Check Fluid Levels⁚ Verify the levels of engine oil, coolant, brake fluid, and other critical fluids, as low levels can contribute to various issues.
- Perform Basic Tests⁚ Depending on the code, you might be able to perform simple tests like checking fuse connections, testing sensors with a multimeter, or verifying electrical continuity.
- Clear the Code⁚ After addressing a potential issue, clear the code and test drive the vehicle to see if the problem is resolved. If the code returns, further investigation is necessary.
- Seek Professional Help⁚ If you’re unable to resolve the issue yourself, don’t hesitate to consult a qualified mechanic for assistance. They have the expertise and equipment to perform more complex diagnostics and repairs.
Remember, troubleshooting can be a methodical process, requiring patience and attention to detail. A logical approach and careful analysis of the information you gather will help you effectively pinpoint the source of the problem.
Safety Precautions
While OBD2 scanners are generally safe to use, it’s crucial to follow these precautions to ensure your safety and prevent potential damage to your vehicle⁚
- Read the Manual⁚ Before using any OBD2 scanner, carefully read the manufacturer’s instructions and warnings. Understand the specific features, limitations, and potential risks associated with your particular model.
- Avoid Modifications⁚ Do not attempt to modify or tamper with the OBD2 connector or the scanner itself. Such actions could damage the vehicle’s electrical system or compromise the scanner’s functionality.
- Don’t Use While Driving⁚ Never use an OBD2 scanner while driving. Distracted driving is dangerous and could lead to an accident.
- Proper Connection⁚ Ensure the OBD2 connector is securely plugged into the Data Link Connector (DLC) under the dash. A loose connection can lead to inaccurate readings or damage.
- Avoid Wet Conditions⁚ Do not use the scanner in wet or damp environments. Water can damage the electronics and create safety hazards.
- Disconnect When Not in Use⁚ Always unplug the scanner from the DLC when it’s not in use. Leaving it connected can drain the vehicle’s battery.
- Seek Professional Help⁚ If you encounter any unexpected issues or safety concerns while using the scanner, consult a qualified mechanic or automotive technician for assistance.
By adhering to these safety precautions, you can minimize risks and enjoy the benefits of using an OBD2 scanner to monitor and maintain your vehicle.